Reggae stages demand a unique backline that delivers the genre’s signature organ “bubble”, funky clavinet “bite”, and earth-shaking bass – all while allowing quick band changeovers. A seasoned festival production team knows that providing the right gear and preparation can make the difference between seamless sets and schedule-killing delays. This blueprint draws on decades of festival experience to help festival producers worldwide equip their stages for reggae performances large and small. From choosing a reliable clone-wheel organ and deep bass rig to labeling every cable, these tips ensure every one-drop beat and skanking guitar chord hits the crowd just right.
Understanding the Reggae Sound Essentials
Successful reggae festivals build their sound on three pillars:
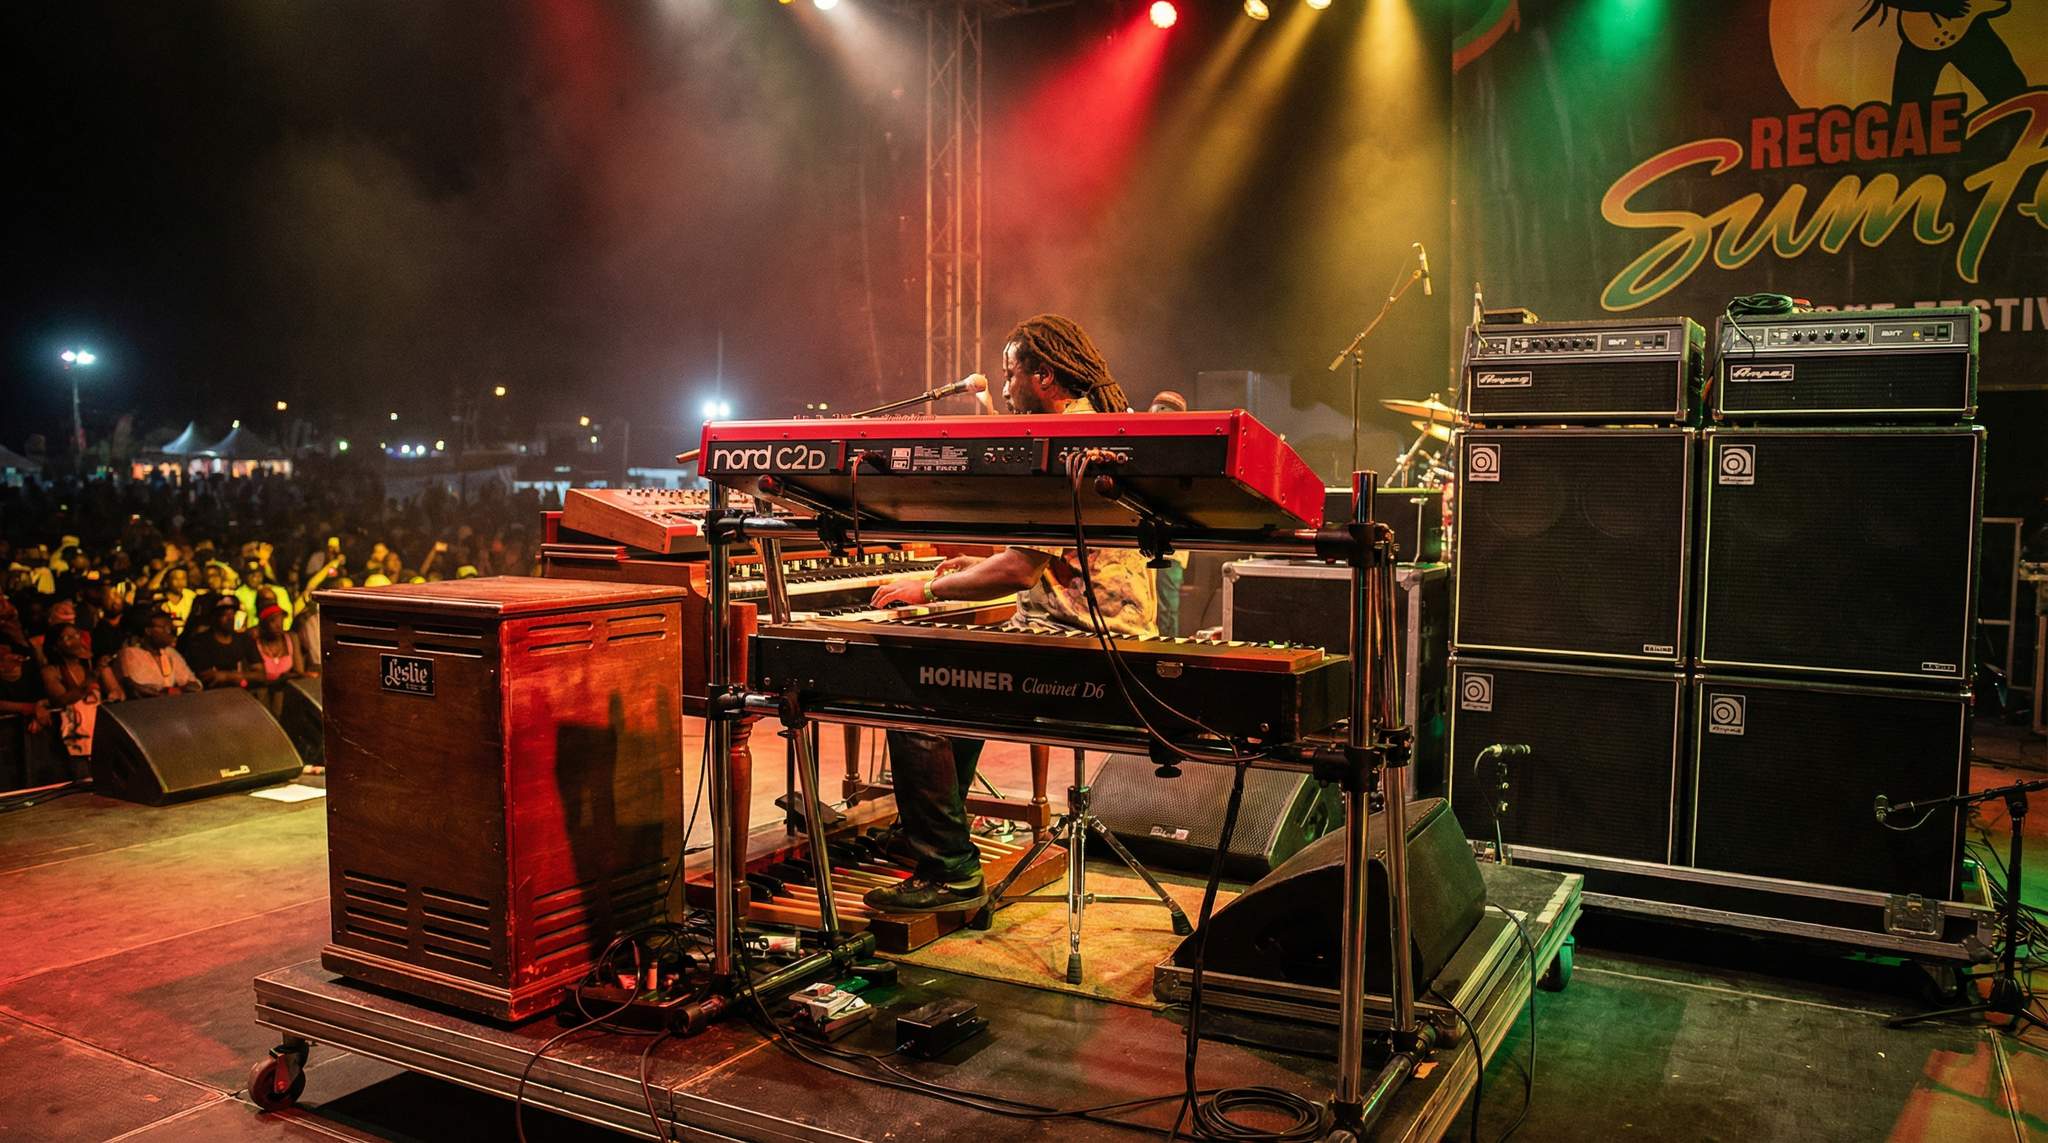
- The Organ Bubble: That rolling, percussive Hammond-organ shuffle that fills the space between drum beats is a hallmark of reggae rhythms. Early musicians leaned hard on this technique, establishing it as the heartbeat behind the heartbeat of the genre. It’s often delivered by a Hammond organ (or a good emulation) with a Leslie speaker’s swirling effect. This “bubble” gives classic reggae its soulful heartbeat, and using the classic gear helps the organ sit in the mix without much additional work.
- The Clavinet Bite: On the funkier side of reggae, a clavinet’s sharp, staccato chords add a rasp and energy that cuts through the mix. The clavinet doesn’t get as much glory as the organ, but it acts as the organ’s snappier, more aggressive cousin. In 1970s roots reggae, the Hohner Clavinet D6 became a secret ingredient, jabbing alongside the guitar skank to add rhythmic texture. (Listen to Peter Tosh’s “Stepping Razor” for a great example of clavinet in action.)
- The Solid Bass Foundation: Reggae’s foundation is a deep, melodic bass line that you feel as much as hear. Bass isn’t background in reggae – it’s front and center, carrying the groove. A proper reggae backline must deliver rich sub-bass without unwanted noise, so the bass can drop “riddim” bombs that hit the audience in the chest.
With these essentials in mind, here’s how an expert festival organizer would design a backline to nail the reggae vibe.
Clonewheel Organ & Leslie: The “Bubble” Machine
A traditional Hammond B3 organ with a Leslie rotary cabinet is reggae’s gold standard for keys – but it’s not always practical on a festival stage. Instead, stock a high-quality clone-wheel organ keyboard that emulates the tonewheel sound reliably. Models like the Hammond XK-5, Nord Electro/Stage, or Crumar Mojo can deliver authentic organ tones without the maintenance headaches of vintage gear. Crucially, pair it with a Leslie or a solid simulation. A real Leslie speaker on stage provides that unmistakable rotating tremolo sound beloved in 70s reggae, capturing the true essence of the genre. If a physical Leslie is too heavy or fragile for your festival, use a digital Leslie simulator pedal or the keyboard’s built-in rotary effect – but ensure it’s dialed in to sound warm and organic, mimicking essential keyboards used by reggae artists.
Practical tips: Position the organ keyboard on a sturdy stand, perhaps with a second tier if the player also wants a piano or synth. Mark the Leslie speed switch (or pedal) clearly, so artists can easily toggle between chorale and tremolo speeds during their performance. Keep the organ’s output going to both the Leslie (mic’d up for front-of-house) and a direct line (using the on-board sim) as backup. This way, if a mic fails or the Leslie has an issue, the show goes on.
Case study – reliability matters: At one international festival, a headliner insisted on using a vintage Hammond on stage – only to discover at soundcheck that the organ’s tuning was off due to the local power frequency (50 Hz vs 60 Hz issue). The day was saved by the festival’s clonewheel backup, already set up and ready to rock. The lesson? Always have a modern, reliable clone organ on hand, and ensure it’s properly configured for local power requirements (most modern keyboards handle multi-voltage, but double-check). The artist still got their organ “bubble” in the mix, and the audience never knew there was an equipment crisis behind the scenes.
Planning a Festival?
Ticket Fairy's festival ticketing platform handles multi-day passes, RFID wristbands, and complex festival operations.
Clavinet: Adding the Funky “Bite”
When your lineup includes roots or dub bands looking for that percussive keyboard bite, a clavinet or a credible substitute should be part of your backline. The Hohner Clavinet D6 – famous for its bright, biting tone – was once ubiquitous in 70s reggae and funk. Its choppy stabs can really animate the groove, acting like a hybrid between a guitar and keyboard in the mix. Unfortunately, real Clavinets are vintage, rare, and temperamental (not to mention hard to keep in tune and serviced on the road).
The solution is to provide a modern keyboard with an excellent clavinet patch. Many clonewheel organs and stage pianos feature clav sounds; for example, the Nord Stage/Electro series is lauded for realistic clavinet emulations, complete with adjustable pickup settings and even simulated “wah” effects. Alternatively, a dedicated stage keyboard like a Yamaha Motif or Montage, Korg Kronos, or similar high-end workstation will have reggae-friendly clavinet presets. Whichever you choose, test the patch for authenticity – it should have that short, aggressive decay and funky “bark” when played hard, reminiscent of the classic Hohner Clavinet sound.
Set the keyboard up ideally as a second tier above the organ or as a standalone on its own stand, depending on artists’ stage plots. Many reggae keyboardists play the organ with one hand and clavinet (or piano) with the other, so arranging two keyboards in a comfortable stack is wise. Label the patches clearly (e.g., preset 1: “Reggae Organ”, preset 2: “Clavinet”) and if possible, save a couple of go-to sounds for each – one clean clav sound and one with an auto-wah effect, for instance. The auto-wah (or envelope filter) is a classic addition to clavinet in reggae and funk, emulating the funky pedal effect without needing the player to bring their own pedal. If your backline budget allows, include an envelope filter pedal (like a Mu-Tron III clone or modern equivalent) in the rig for the clavinet – some players will be thrilled to stomp and get that authentic “wacka-wacka” funk tone.
Finally, brief the artists during advance that a clavinet sound will be available. If any band insists on the real thing, consider sourcing a Hohner D6 from a specialized backline rental – but also plan for extra setup time and a skilled tech to maintain it. For most cases, a top-notch clav emulator will more than suffice and avoid potential failures (broken strings or sticky keys on an old D6) mid-set.
Guitars and Amps: Clean, Crisp Skanks
Reggae guitar may not take flashy solos, but it plays a crucial rhythmic role with the offbeat “skank” chords. To get that cutting yet clean guitar sound, provide two guitar amplifiers with plenty of clean headroom. Why two amps? Many reggae bands have two guitarists (rhythm and lead), and even if not, having a spare amp on deck is a lifesaver if one fails. It also offers guitarists a choice of tones.
Amp characteristics: Look for tube combo amps or heads known for loud, clean tone. Classic Fender amplifiers (like a Twin Reverb or Deluxe Reverb) are popular because they can stay clean at higher volumes and have a bright, scooped sound ideal for reggae rhythm. The Roland JC-120 Jazz Chorus, a solid-state staple, is another excellent choice – renowned for its ultra-clean output and built-in lush chorus, it’s a favorite in many reggae and ska circles for crisp skank chords. Other options could include a Vox AC30 or AC50 (though Vox amps break up more, so use with caution for clean needs) or a head+cab like a Hiwatt DR103, which was built for high headroom.
Need Festival Funding?
Get the capital you need to book headliners, secure venues, and scale your festival production.
Place one amp on each side of the stage if two guitarists are expected, or keep one slightly off-stage as a quick swap backup. Fresh tubes and proper servicing are a must – a noisy, humming guitar amp is not welcome in the quiet moments of a dub breakdown! Fit each amp with a power conditioner or at least a surge protector, especially at outdoor festivals where generators or uncertain power might cause voltage spikes.
Keep the EQ fairly flat to start and avoid adding distortion – reggae guitar should “kling” and “klang” with clarity. If possible, include a couple of basic guitar stands and a pedalboard with common effects (a tuner, maybe a digital delay or spring reverb pedal, and a wah). Many reggae guitarists will bring their own small pedal setups, but having a tuner pedal ready on each side is a thoughtful touch that speeds up line-checks.
Clean headroom saves the day: At a large outdoor reggae festival in California, an opening act’s guitarist plugged into the provided 50-watt amp and found it started to distort at the volume he needed. The quick-thinking stage crew swapped him over to the spare 100-watt Fender Twin (which had higher headroom), and the band’s skanks stayed clean and chiming through the whole set. The audience heard classic ska-like guitar chops, not an overdriven crunch – exactly how it should be. Moral: always overspec guitar amps for clean tone in reggae; it’s easier to dial back volume than to fight unwanted distortion.
Bass: Deep, Quiet Low-End Power
The bass rig is arguably the most critical piece of reggae backline. It must deliver deep sub-bass frequencies (for that chest-rattling drop on the one beat), but remain quiet in terms of noise floor. In reggae, when the band lays back or during a dubby breakdown, a humming or buzzing amp can really become obvious – and annoying. Here’s how to get a solid bass setup:
Amp and Cabinet: Provide a high-wattage bass head (500W or more) and high-quality cabinets that can handle serious low frequencies. Classic Ampeg stacks are a common choice – the Ampeg SVT paired with an 8×10 “fridge” cabinet is almost an industry standard for big reggae stages, as old tube amps keep things fat and round. These amps can thunder with a warm, round tone and, as one reggae veteran put it, “shake the walls without turning to tonal mush,” ensuring the low end remains distinct. If an 8×10 is too cumbersome for your stage or budget, a couple of 4×10 cabinets (one on each side of the stage perhaps) or a 1×15 + 4×10 combo can suffice. Modern lightweight options like Markbass or Aguilar amps and neo cabinets can also do the job and are easier to move – just ensure they produce a thick, flat low-end.
Noise control: To keep the rig quiet when idle, use quality cables and proper grounding. Include a ground-lift DI box for the bass channel so the engineer can eliminate any hum in the direct signal if needed. If the amp head has a fan, check that it’s working and not overly loud or rattling – a dying fan can buzz like a bee in the PA during quiet songs. Many modern bass heads are thankfully designed to be low-noise. It’s also wise to have a spare bass head or preamp on hand; some festivals keep a second identical amp ready to swap via an A/B switch in case the main head overheats.
Since many big-name reggae bassists prefer running direct (DI) to front-of-house (to capture a pure signal often enhanced with compressors or preamps), make sure to satisfy both worlds: mic the cabinet (for on-stage feel and some analog grit) and send a DI line. That gives the mix engineer options. Communicate with the bassists or their techs in advance – some might want to use their own preamp pedal or even bring their entire amp. Be flexible: if an artist wants to use their own head with your cabinet, accommodate it quickly (have those speaker cable looms labeled!). If they use in-ear monitors and want no amp at all, be ready to strike the amp off stage fast.
A note on bass guitars: While the festival usually doesn’t supply the instrument, it’s good to know what basses artists are bringing so you can adjust the rig. Most reggae players use 4-string basses (Fender Precisions and Jazz basses are favorites for their warm tone), but some modern bands might have a 5-string. Ensure your cabinets and EQ can handle a low B string if needed. Roll off excessive highs on the amp – reggae bass should be deep and solid, not clanky. Consider stringing a house bass with flatwound strings and keeping it tuned up backstage as an emergency backup – it has saved the day when a touring bass had a last-minute technical issue. That flat, thumpy tone of flatwounds is actually preferred in reggae. There is some gear nerdery worth knowing regarding string selection, so your backup will sit right in the mix if it’s ever pressed into action.
Drums: A One-Drop-Ready 5-Piece Kit (with Spares)
No reggae backline is complete without a rock-solid drum kit tuned for the genre’s unique grooves. Provide a quality 5-piece drum kit that can cover both one-drop rhythms and steppers beats effortlessly. A typical setup would be: kick drum (20″ or 22″ diameter for a deep thud), snare (14″ wooden snare, known for warmth), two rack toms (e.g. 12″ and 13″), and one floor tom (16″). Add sturdy hardware: hi-hat stand, cymbal stands (at least two boom stands for crashes and one straight stand for a ride), a throne, and a bass drum pedal. Cymbals are often personal to drummers, but you should have a set available in case: 14″ hi-hats, a 20″ ride (preferably with a clear ping for those rockers and steppers grooves), and 16″ and 18″ crashes. Durable brands like Zildjian or Sabian work well across styles.
Tuning for reggae: The kit should be tuned to a fairly deep, resonant tone. In one-drop reggae, the snare often hits on beat 3 (and sometimes as a rim click), so many reggae drummers favor a fat, mellow snare sound rather than a high crack. Tune the snare slightly lower than a rock setup and consider a bit of muffling (a gel or a piece of tape) to shorten the ring. The kick drum should be felt as a boom – use padding inside the kick to control excessive sustain, but don’t choke it completely. One-drop beats often leave space on beat 1, but when the kick hits (beats 3 or 1 depending on style), it must be round and full. Steppers (the four-on-the-floor driving beat in some reggae) will have the kick pumping every quarter note, so ensure the pedal and head can handle repeated hits without losing tone. Toms can be medium-low tuning; reggae drum fills (think Carlton Barrett or Sly Dunbar style) often walk down the toms melodically, so clear pitch and sustain is nice to have.
Spare heads and more: Drummers are usually picky about their kit feel, and festival kits see a lot of players, so maintenance is key. Start the festival day with fresh drumheads on snare and kick at minimum. Have spare heads for each size drum ready to go (at least one extra snare head and one bass head, plus a couple of tom heads of the common sizes). Also keep a spare bass drum pedal within arm’s reach – one hard-hitting steppers groove with a double kick pattern can snap a beater or spring unexpectedly. An extra hi-hat clutch, snare wires, and even a spare drum throne (in case height adjustment fails on one) are small backup items that can save a set.
Setup and changeover tips: Mark the drum rug with tape for the general position of each stand and drum. This “memory marking” helps reposition things quickly if a drummer moves them or if a whole kit has to be swapped out. Encourage drummers in advance to use the festival kit to keep changeovers fast; if a band insists on using their own snare or cymbals, make sure the stage crew is prepared to do that swap swiftly. It helps to standardize the setup: for example, keep the rack toms on a shared mount or clamp that’s easily adjustable, so swapping a snare or adding a cymbal doesn’t require reworking the whole kit.
Before the festival, have a drummer (or drum tech) tune the kit for optimal reggae sound – typically a bit lower tuning on snare and toms than pop/rock, and a nicely thumpy kick. During the show, a stage tech should have a drum key in pocket at all times. Quick tuning touch-ups or tightening a loosening cymbal wingnut between acts can keep everything running smoothly.
Streamlined Changeovers: Labeling, Looms and Checklists
At multi-act festivals, time between sets is precious. A well-designed backline and stage setup can be flipped for the next band in minutes – if you’ve prepared with labeling, color-coding, and a solid reset routine.
Label patch points clearly: Every connection on stage – from the bass DI to the organ output – should be labeled and correspond to the master patch list. Use easy-to-read labels or color-coded tape on cables and inputs. For example, tag the organ’s DI box and the snake channel it goes to as “Organ L/R”, mark the guitar mic lines as “GTR Amp 1” and “GTR Amp 2”, etc. This way, when a new band’s engineer or the stage crew is line-checking, there’s no mystery which cable is which. Color-code looms for sections of the stage: you might bundle all drum mic cables in a loom wrapped with red tape, all guitar/bass lines in blue, and all keyboard lines in green. These looms can connect into sub-snakes or multi-pin connectors. The result – come changeover time, entire sections of the stage can be disconnected or reconnected with one plug, or at least identified at a glance. Implementing strategies for festival stage management ensures that guitar cabinets and mic placements are always consistent and easy to manage. Fast swaps mean the next band gets more time to soundcheck and stays on schedule.
Use a “reset to default” checklist: Festivals often have a standard stage plot or default setup that acts as a starting point for every band. Create a simple checklist for your stage crew to reset the backline to that default after each performance. This checklist might include:
- Amps settings reset: Volume and tone knobs on guitar and bass amps back to a neutral or pre-agreed position (e.g., “Guitar Amp at 4, Bass Amp at 5, EQ flat”). This prevents one band’s extreme settings from carrying over to the next by accident.
- Kit reset: Drum throne height, cymbal stands placement, and drum tuning checked. (Markings on stands help here – e.g., hi-hat stand collared at a tape mark.) Replace any drum or cymbal a band removed with the festival’s set. Ensure the spare snare is back if the previous drummer swapped theirs in.
- Keyboard presets: Re-select the “default” organ sound on the clonewheel, and set Leslie sim to slow. If a band fiddled with drawbars or menus, quickly dial them back to a standard reggae B3 sound. Similarly, return any borrowed keyboard to a base patch (so the next player doesn’t start with a weird effects-laden tone from the previous set).
- Mic positions: Quickly reposition mics to the standard setup – for instance, guitar amp mics back on center cone (marked with tape on the cabinet grill), vocal mics back to center stage on their stands, drum overheads back to marked height. If the last band’s singer lowered a mic stand, extend it back up.
- Clear the deck: Remove any set lists, tape, or personal gear left by the previous band. A clean stage is ready for the next.
- Power cycle if needed: For any gear that overheated or glitching (maybe a digital keyboard), a quick off/on can reset it. Otherwise, ensure everything is powered and on standby ready to go for line check.
Post this checklist on the wall backstage or on the side of the stage where crew can see it, and assign specific roles (one person handles amp resets, another does drums, etc.). With everyone following the same reset routine, your stage will be a well-oiled machine.
Pro tip: Do a brief line-check after reset and before the next band plugs in. This means one of the stage techs or the monitor engineer quickly confirms that each backline element is outputting signal (a quick thump on the bass strings, a couple of organ chords, a tap on the snare) to ensure nothing got muted or disconnected during changeover. This reassurance catches issues before the band is onstage waiting.
Be Prepared: DIs, Reamps and Other Spurs in the Sides
Even with perfect planning, live shows throw curveballs. A top festival backline is prepared with spares and adapters for any situation:
- Spare DI Boxes: DI boxes are inexpensive but invaluable. Keep a few extra passive and active DIs at the ready. If the bassist’s DI dies or the keys suddenly need another output isolated, you can swap in a spare DI in seconds. Look for ground lift and pad switches on them – handy for eliminating hum or reducing a hot signal.
- Reamp Options: Occasionally, an artist might want to route audio in an unconventional way (like playing a recorded sample from a laptop through a guitar amp on stage for effect, or sending the keyboard’s organ into that Leslie cabinet you provided). A reamp box converts line-level signals to guitar-level impedance, allowing you to safely run a playback device into an amp as if it were a guitar. Having one or two reamp boxes gives you creative routing flexibility. For example, if a dub producer wants to send a drum machine through the bass amp for a vintage effect, you can accommodate without frying the gear.
- Extra Cables and Adaptors: Stock plenty of instrument cables, XLR cables, power cords, and international plug adapters. Tape down and color-code spares at the back of the stage so they’re accessible. If a guitarist’s cable crackles mid-set, a tech can grab a fresh one from a hanger on the backline rig and swap it instantly. Keep IEC power leads (for amps, keyboards) on hand – they often go missing or get damaged during frantic changeovers.
- Tool Kit: A basic toolkit with screwdrivers, gaffer tape, flashlight, drum key, spare fuses for amps, and electrical tape is mandatory. Many festivals also keep a soldering iron side-stage for emergency cable repairs, but the goal is to have enough spares that you rarely need to solder mid-show.
- Communication: Equip your stage crew with a comms system or at least clear hand signals. A lot of backline troubleshooting can be solved faster when the monitor engineer and stage techs are in sync (e.g., a quick shout like “Bass DI backup!” if the main amp goes down, so the FOH can push the DI signal).
Successes, Failures, and Learning Opportunities
It’s worth noting a couple of real-world examples that underscore these practices:
-
Success story: At Rototom Sunsplash in Spain – one of Europe’s biggest reggae festivals – the organizers provide nearly identical backline setups on multiple stages, each with a well-maintained Hammond clone, twin guitar amps, and a top-tier bass rig. During one edition, a touring band’s own keyboard failed right before their set. They seamlessly shifted to the festival’s clonewheel organ, already dialed in with a reggae patch. The crowd was none the wiser, and the schedule stayed on track. The band later praised the festival for having “exactly what we needed waiting on stage” – a testament to thoughtful preparation.
-
Learning from trouble: At a smaller reggae fest in the Caribbean, an afternoon downpour tested the backline crew’s readiness. Though the stage was covered, wind blew mist onto one of the guitar amps, causing it to short out right during a live set. The crew had not pre-staged the spare amp on standby, resulting in a scramble. The lesson here was clear: always weather-proof your gear (tarps and covers when idle, raised platforms for electronics) and keep backups powered and ready. After that incident, the festival invested in waterproof amp covers and made it standard to have backup amps plugged in, on standby (with volumes down) at the edge of the stage. The next time rain hit, they swapped a drenched stage monitor and a guitar amp in less than a minute.
Every challenge is a chance to improve your backline strategy. From power conversions to cultural considerations (for instance, in some countries artists might expect a cup of tea on the amp – make sure any hospitality items stay clear of electronics!), a veteran festival producer stays adaptable and respectful. Communicate with artists in advance about the provided gear – advancing the tech riders is critical. If an artist knows you have the bass amp they love or the exact keyboard they request, they’ll come in confident and positive. If they have concerns, you have time to address them (maybe you’ll decide to rent that particular amp model for the day).
Frequently Asked Questions
What is the reggae organ bubble?
The reggae organ bubble is a rolling, percussive rhythmic technique that fills the space between drum beats, acting as the genre’s heartbeat. It is typically produced using a Hammond organ or clonewheel keyboard paired with a Leslie speaker to create a swirling effect. This sound allows the keys to sit perfectly in the mix without additional processing.
What are the best guitar amps for reggae festivals?
The best guitar amps for reggae offer high clean headroom to ensure crisp “skank” chords without unwanted distortion. Tube combos like the Fender Twin Reverb or solid-state options like the Roland JC-120 Jazz Chorus are ideal choices. Festival organizers should provide two amps per stage to accommodate lead and rhythm players or serve as backups.
How should a bass rig be set up for reggae?
A reggae bass rig requires a high-wattage head (500W+) paired with cabinets like an Ampeg 8×10 to deliver deep, melodic sub-bass. The signal must remain clean and quiet during breakdowns, often utilizing a ground-lift DI box to eliminate hum. Using flatwound strings on a backup bass helps achieve the preferred warm, thumpy tone.
How do you tune a drum kit for reggae music?
Reggae drum kits require a deep, resonant tuning with a fat, mellow snare sound rather than a high crack. The snare is often tuned lower and muffled to shorten the ring for one-drop beats. Kick drums should be padded for a round, full boom, while toms are tuned medium-low to support melodic fills.
Why is a clavinet used in reggae backline?
The clavinet provides a sharp, percussive “bite” that cuts through the mix, acting as a rhythmic counterpoint to the organ bubble. Originally popularized by the Hohner Clavinet D6 in 70s roots reggae, this staccato sound adds funky texture. Modern festivals often use high-quality emulations from keyboards like the Nord Stage to ensure reliability.
How can festivals speed up band changeovers on stage?
Festivals can streamline changeovers by color-coding cable looms and labeling every connection point on the stage. Implementing a “reset to default” checklist ensures crews quickly return amps, mics, and drum hardware to standard positions between sets. Using sub-snakes allows entire stage sections to be disconnected or reconnected efficiently.