When dusk falls at a bustling food festival, the right lighting can make the difference between a vibrant evening and a dim, unsafe experience. Proper illumination at food festivals serves two vital purposes: functionality and ambiance. It ensures vendors can safely prepare dishes, and it creates a welcoming atmosphere for attendees enjoying their meals. Veteran festival producers emphasize that lighting ranks alongside sound and decor as a critical element — one that directly impacts attendee safety and enjoyment. In fact, the right lighting design not only keeps everyone safe after sunset, it can transform an ordinary market into an unforgettable nighttime experience that encourages people to linger and even spend more.
This guide lays out prep and dining lighting plans drawn from decades of festival production experience. It will cover how to provide glare-free task lighting for food prep areas, craft warm ambient lighting for dining spaces, and keep the entire festival venue safe and inviting after dark. New and seasoned festival organizers alike will find actionable tips on balancing practical needs with creative flair to light up any food festival night.
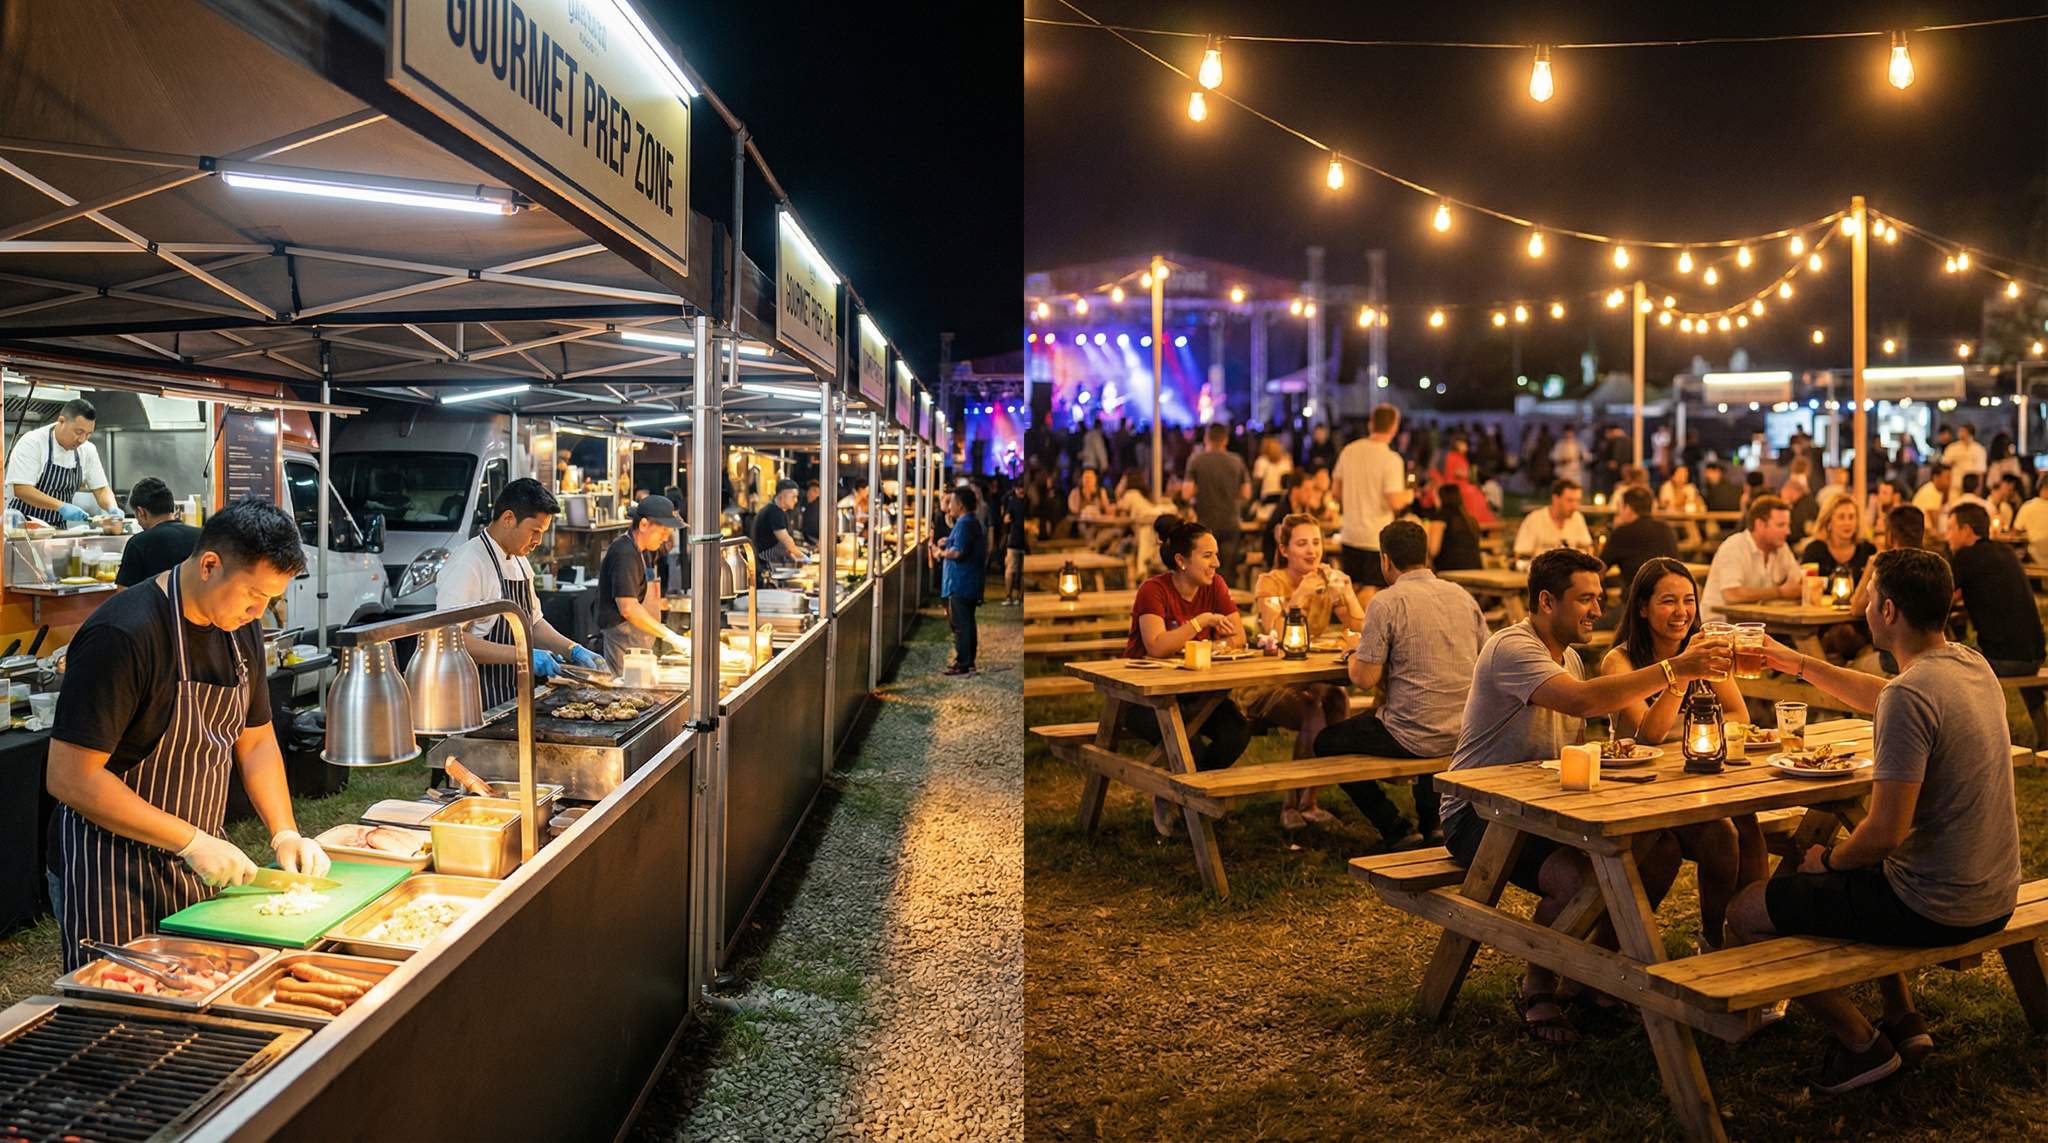
Glare-Free Task Lighting for Prep Areas
Food festivals often involve dozens of vendor booths or food trucks where chefs are chopping, cooking, and plating in the evening hours. These prep areas require strong, focused light so staff can work safely with knives, grills, and hot oil – but that light must be delivered without blinding glare. Achieving this balance is critical for both food safety and worker comfort.
When designing food prep lighting, organizers must account for the unique challenges of temporary outdoor kitchens. Unlike standard ambient illumination, dedicated prep station lights need to provide high visibility without casting harsh shadows over cutting boards or cooking equipment. High color rendering index (CRI) bulbs are especially useful here, allowing chefs to accurately judge the doneness of meats and the freshness of ingredients.
Provide sufficient illumination: Make sure prep surfaces are well-lit to meet food safety standards. Many health departments recommend around 540 lux (50 foot-candles) of light on work surfaces for safe food handling and sanitation. In practice, this means installing enough fixtures (or high-output bulbs) in each vendor stall so that every chopping board and stovetop is clearly visible.
Use the right fixtures: Opt for LED task lights or overhead lights with diffusers that spread light evenly. LEDs run cool and use little power, so you can give vendors plenty of light without overloading circuits or heating up the booth. Avoid bare, exposed bulbs that shine directly into people’s eyes. Instead, choose fixtures with shields or reflectors that direct light downward onto the work area. For example, a vendor tent could have an LED bar light mounted along the frame, aimed at the countertop – this lights the chef’s workspace brilliantly while keeping the bulb out of the chef’s line of sight.
Planning a Festival?
Ticket Fairy's festival ticketing platform handles multi-day passes, RFID wristbands, and complex festival operations.
Position lights to minimize glare: The placement of lights matters just as much as their brightness. Mount or hang lights above eye level and angled downward so the beam hits the prep surface, not the worker’s face. If a light must be at eye level (like a lamp on a table), using an opaque shade or frosted covering can soften it. The goal is that a chef can look up from the food without being dazzled by a harsh light source.
Real-world lesson: At an evening food fair in London, festival organizers once installed a powerful floodlight to illuminate a row of vendor tents. While it certainly was bright, its harsh beam was pointed at the wrong angle – chefs and guests found themselves squinting and holding up hands to block the light. After quick feedback, the team adjusted by swapping in diffused LED fixtures inside each tent and angling them toward the countertops. Instantly, the glare problem vanished. The vendors could see clearly to cook, and customers could comfortably watch their food being prepared. This experience became a lasting lesson: more light isn’t always better unless it’s deployed with care.
Mind the color temperature: Extremely harsh white-blue lighting can cause eye strain and glare on shiny surfaces. Aim for a neutral or warm-white light in prep zones (around 3000–4000K color temperature). This range still provides good color rendering (so chefs can judge food doneness and quality) but is easier on the eyes than cold blue-tinted lights. Some festivals even use high-CRI LED lights in kitchens to ensure food colors appear natural under artificial light.
Plan for power and safety: Each prep station’s lighting should be accounted for in your power distribution plan. Coordinate with vendors on their electrical needs – a food truck might have its own lights, whereas tented booths may rely on festival-provided lighting. Ensure cables for lights are safely routed and taped down to avoid trips or snags. Use weather-rated fixtures and connections (with appropriate IP65+ protection) in case of rain or if booths are outdoors; a sudden downpour shouldn’t knock out the lights or create electrical hazards in a busy kitchen.
By prioritizing glare-free, adequate task lighting, you create a safer, more efficient workspace for your food vendors. They can focus on crafting great dishes without squinting or working in their own shadows. This not only prevents accidents but also improves the quality and speed of service – a win-win for vendors and festival-goers alike.
Warm Ambient Lighting for Dining Areas
While chefs need bright light to cook, attendees dining after dark prefer a warm, inviting glow that makes the festival feel magical. Ambient lighting in seating and eating areas is all about creating atmosphere without sacrificing visibility. Festival-goers should be able to comfortably see their food and friends, yet still feel like they’re at an evening event – not under a hospital fluorescent. Striking this balance elevates the dining experience and encourages people to relax and stay longer under the lights.
Need Festival Funding?
Get the capital you need to book headliners, secure venues, and scale your festival production.
Embrace warm tones: Warm-hued lighting (think soft yellows, golds, and oranges) creates a cozy ambience. This is why many food festivals string up Edison bulb lights or “bistro” string lights above eating zones – these small, warm bulbs cast a mellow light that allows people to see without glaring brightness. As one event specialist notes, a strand of LED bistro lights can provide enough illumination for diners to see, but not so much that the mood is lost, creating a magical night under the stars. Aim for color temperatures around 2200K–3000K for that gentle golden glow. An added bonus: lights on the warmer end of the spectrum tend to attract far fewer insects compared to harsh white lamps, meaning fewer bugs bothering your guests as they eat.
Layer the lighting: Treat your dining area lighting like a stage set – use multiple layers for effect. Overhead string lights can handle general illumination, but consider adding accent lighting to boost the atmosphere:
- Tabletop lights: Place enclosed candles or battery-powered LED lamps on dining tables for a charming, flickering effect at eye level. (For safety, many festivals opt for LED tea candles or lanterns rather than open flames, especially in windy outdoor conditions.)
- Lanterns and decorative fixtures: Hang paper lanterns, fairy light strands, or culturally-themed lamps (e.g. colorful lanterns for a street food market theme) around the seating area. These not only provide light but also serve as decor that reinforces your festival’s identity.
- Uplighting and art installations: Use ground uplights on trees, walls, or food stall facades around the dining space to create a pleasant glow. If your festival has art pieces or signage, light them softly so they contribute to the ambient light. For example, gently uplighting a central sculpture or projecting a subtle pattern on a tent ceiling can add visual interest without overwhelming diners.
Avoid visual discomfort: Just as with prep areas, glare should be avoided in guest areas. No one wants a spotlight shining in their eyes as they eat. Position lights so that bulbs aren’t at direct eye-line for seated guests. Often this means hanging lights higher up (but not so high that all the light is lost) and using shades or string light hoods if needed. Keep the brightness at a moderate level – you may even install dimmers to adjust the intensity through the evening. During early twilight you might keep lights softer (so as not to compete with the sunset), then gradually brighten as the night deepens and people need a bit more light to move around.
Design for atmosphere: Think about the feeling you want in the dining area. A craft beer and BBQ festival might favor a rustic vibe with bare filament bulbs and wooden lanterns, whereas a gourmet wine tasting event might use elegant fairy lights and cool amber spotlights highlighting the wine barrels. Match the lighting style to the theme and audience. Also be mindful of color effects – overly colored lights can tint people’s food in unappetizing ways (nobody wants their steak to look green!). Sticking to warm white or soft amber tones around the food is a safe bet to make both the cuisine and the crowd look their best.
Success story: At a night street food market in Singapore, festival organizers suspended a canopy of lanterns and festoon lights above the picnic tables. The dining area was bathed in a sea of warm, inviting light that perfectly matched the event’s festive vibe. Visitors lingered under the gentle glow well after finishing their meals – taking photos, chatting, and soaking in the atmosphere. The lighting wasn’t just illuminating the space; it became a defining feature of the festival’s identity, proving how a well-lit dining area can turn a simple food court into the heart of an event.
By investing in warm, well-thought-out ambient lighting, festivals create an irresistible dining atmosphere. When guests feel comfortable and enchanted by their surroundings, they’re likely to stay longer, spend more on that extra dessert or drink, and share photos of the beautiful scene – all outcomes that benefit the festival’s success.
Lighting for Safety and Navigation
Beyond the food prep and dining areas, a festival’s overall lighting plan must keep everyone safe as they move through the venue. No corner of your event should become a hazard once the sun goes down. A well-lit festival site prevents accidents and helps attendees feel secure, which means they’re more likely to explore and enjoy the event into the night.
Illuminate walkways and common areas: Identify all the paths attendees will take – entrances, walkways between vendor booths, routes to restrooms, and exits to parking or public transit. These areas need sufficient lighting so people can clearly see where they’re walking. Options like solar-powered LED path lights or low-level stake lights are great for lining paths without running extensive cabling. You can also string lights along fencing or between trees to outline a walkway. For large open spaces, consider using light towers or diffused balloon lights that cast a broad, gentle glow over a wide area. The key is even, consistent coverage: avoid dark patches where people might trip on uneven ground or obstacles.
Highlight important points: Make sure critical locations are lit and easily identifiable. Entrance gates should be well-lit to welcome guests (and for ticket/security staff to operate effectively). Exit signs and routes need lighting so people can leave quickly if needed. If your festival is using large tents or structures, install illuminated EXIT signs at tent doors as required by safety codes. Similarly, first aid stations, information booths, and toilets should have lights and clear signage. A visitor should be able to spot these facilities from afar by the lights guiding them. Many events achieve this by mounting a light or LED beacon high on a pole above key service areas (for example, a colored light marking the medical tent).
Prevent trips and electrical hazards: In the excitement of a night festival, attendees might not watch their step at all times. It’s the festival organizer’s job to remove or illuminate tripping hazards. Use cable covers or cord ramps anywhere power cables cross pedestrian areas. Mark any tent stakes, generator cables, or low steps with small LED markers or glow tape so they’re visible in low light. Additionally, ensure all lighting equipment is waterproof and safely installed – wet conditions or spilled drinks shouldn’t lead to electrical shocks. All outdoor connectors should be elevated off the ground or in protective enclosures. Schedule a site walk-through at dusk before the event opens to test the lighting; have staff simulate walking the paths to spot any hazards or dark corners that were missed in planning.
Balance ambiance with safety: Safety lighting doesn’t have to mean ugly, harsh floodlights everywhere. The trick is to integrate functional lighting into the festival design. For instance, you might use strings of festoon bulbs along a pathway instead of industrial work lamps – it achieves visibility and adds charm. You can also use colored lighting judiciously (like softly illuminating trees or structures by paths) to provide light without looking like streetlights. Just keep color-cast subtle enough that it doesn’t obscure true visibility (blue light, for example, can make it hard to see some details). In all cases, avoid blinding attendees: lights used for safety should be pointed downward or shielded so they light the ground, not people’s eyes, lighting outdoor events without compromising impact. If you do need a bright security floodlight in an area, choose one with glare control flaps or diffusers.
Plan for the unexpected: Include contingency lighting in your plans. Power outages or blown fuses can plunge areas into darkness if you’re not prepared. Many veteran festival producers bring backup generators or battery-powered lights for critical areas. Emergency flashlight stations and lighting towers on standby can save the day if the primary system fails. Train your crew on how to quickly restore lighting or guide crowds with flashlights should an outage occur. It’s also wise to have a cutoff time and a lighting strike plan – for example, at closing time, gradually raise illumination levels or flash house lights to signal attendees that the event is winding down.
Safety in action: At Germany’s famous Oktoberfest, lighting isn’t just inside the beer tents – the festival organizers also line the festival grounds, walkways, and exits with ample lighting. Strings of lights and lampposts guide tens of thousands of visitors as they navigate the fairgrounds at night. This thoughtful illumination has been key to managing the huge crowds safely; even after hours of revelry, attendees can easily find their way out without incident. It’s a great example of how proactive site lighting keeps a festive atmosphere while preventing accidents.
With a comprehensive safety lighting plan, you create an environment where attendees feel comfortable roaming after dark. Families with children and older guests will appreciate the thoughtfulness of a safely lit venue. And importantly, your festival avoids accidents and liabilities that can arise from poor lighting. A well-lit festival space means the focus can remain on the food, fun, and festivities, rather than on avoidable mishaps.
Planning, Budgeting, and Execution
Creating an effective lighting plan for a food festival requires early planning and coordination – it’s not something to bolt on at the last minute. Start with a lighting walkthrough well before the event: visit the venue after dark (or if that’s not possible, study site plans and imagine the night conditions) to identify what areas will need illumination. Mapping out every light – from each prep stall lamp to each path light – ensures there are no surprises on event day.
Sourcing the right lighting for festivals often means partnering with specialized production vendors who understand the rigors of multi-day outdoor events. These professionals can supply weather-rated fixtures, heavy-duty power distribution systems, and scalable rigging solutions that standard party rental companies might lack.
Budget for quality lighting: Allocate a portion of your event budget specifically for lighting and power distribution. The amount will scale with the size of the festival, but the key is not to skimp. It’s tempting to cut costs by using minimal lights, but that often backfires with safety issues or a dull atmosphere. Instead, invest in good lighting gear or reputable vendors – the payoff is a smoother, safer event and happier attendees who stay longer (translating to more revenue from food and drinks). If using generators, factor in fuel costs and consider energy-efficient LED lights to reduce power consumption (saving fuel and generator run-time). Remember to include spare bulbs, extension cords, cable covers, and lighting rigging in your budget as well, since these small items can be lifesavers onsite.
Work with professionals if needed: For large-scale festivals, it can be worth hiring a lighting designer or electrician to help plan and execute the lighting. Professionals can calculate proper light levels, ensure electrical safety, and even program lighting controllers or effects if your event needs them. They will also understand local regulations – for example, some cities require permits for generator use or have rules about light pollution. Even for smaller events, consulting with your lighting rental supplier about your layout can result in valuable tips (they might suggest, say, balloon lights for a particular dark zone, or more string lights for a certain area).
Logistical coordination: Integrate the lighting plan with your overall festival operations. That means scheduling adequate time for setup and testing of lights before the festival opens. Hanging dozens of string lights or positioning light towers can be time-consuming, so build it into the production schedule. Coordinate with other departments: the electrical team needs to know where to run power drops for food vendors’ lights; the decor team might need to hang lanterns or mount fixtures on structures. Assign specific staff to manage lighting on event days – they can do things like turn lights on at the right time (as daylight fades), monitor for any outages (and quickly replace any burned-out bulbs), and adjust dimmers or timers as needed throughout the event.
Risk management: Consider worst-case scenarios and have backup plans. If high winds are forecast, ensure all lighting installations (especially hanging lights or tall fixtures) are secured with extra safety cables or taken down if conditions get dangerous. If heavy rain is a possibility, have tarps or enclosures ready to protect lighting equipment or sensitive power connections. For multi-day festivals, decide whether lights will stay up overnight – you might leave some security lighting on site for vendors to safely restock at night or to deter trespassers, but other systems might be powered down to save fuel. Establish a protocol for a lighting failure: who on the team is responsible for troubleshooting, and how will you alert attendees if a section of the venue goes dark temporarily? By thinking these through, you can respond calmly and quickly if something does go wrong.
Evaluate and iterate: Finally, treat each festival as a learning opportunity. After the event, note what lighting aspects worked well and what didn’t. Maybe the new LED floodlights kept the parking area safer than last year’s halogens, or perhaps you discovered the family area could use more gentle lighting next time. Gather feedback from guests, vendors, and staff about the lighting – you might be surprised by insights (e.g., a vendor might point out they needed an extra task light, or attendees might rave about the beautiful lantern setup). Use this to continually refine your lighting plan for future events.
By making lighting an integral part of festival planning, you set the stage (and the table) for a truly successful event. When lighting, logistics, and creativity converge, the result is a food festival that not only feeds people, but also shines in their memory.
Frequently Asked Questions
What is the recommended lighting level for food festival prep areas?
Health departments typically recommend around 540 lux (50 foot-candles) of light on work surfaces to ensure safe food handling and sanitation. Achieving this requires installing enough high-output LED fixtures or overhead lights with diffusers in each vendor stall so that chopping boards and stovetops are clearly visible.
How can festival organizers prevent glare in food vendor booths?
Minimize glare by mounting lights above eye level and angling them downward so the beam hits the prep surface rather than the worker’s face. Using fixtures with opaque shades, frosted coverings, or diffusers also softens the light, allowing chefs to work safely with knives and hot oil without being dazzled.
What is the best color temperature for outdoor dining lighting?
Warm-hued lighting between 2200K and 3000K creates the most inviting atmosphere for dining areas. This range provides a gentle golden glow that encourages guests to relax and linger. Additionally, lights on this warmer end of the spectrum tend to attract fewer insects than harsh white lamps.
How should walkways be illuminated at night festivals for safety?
Walkways require even, consistent coverage to prevent accidents on uneven ground. Effective options include solar-powered LED path lights, low-level stake lights, or string lights along fencing. For large open spaces, diffused balloon lights cast a broad glow without blinding attendees, ensuring paths and obstacles remain visible.
What types of lighting work best for festival dining areas?
Effective dining area lighting layers multiple sources for atmosphere and visibility. Overhead string lights or bistro bulbs provide general illumination, while accent lighting like LED tea candles on tables adds intimacy. Decorative elements such as paper lanterns or uplighting on trees further enhance the festival’s visual identity.
How should organizers plan for lighting power needs at outdoor events?
Organizers must coordinate with vendors to account for every prep station and ambient light in the power distribution plan. Using energy-efficient LED fixtures reduces power consumption and generator load. Always secure cables with covers or ramps to prevent tripping hazards and ensure all outdoor connections are weather-rated.
What makes lighting for festivals different from standard outdoor event lighting?
Lighting for festivals requires a multi-layered approach that balances high-intensity task illumination for vendors, warm ambient glows for dining areas, and broad safety lighting for crowd navigation. Festival organizers must also account for heavy-duty, weather-rated power distribution across large, often uneven outdoor footprints.